Zoom Webhooks
To integrate Zoom webhooks with ngrok:
This guide covers how to use ngrok to integrate your localhost app with Zoom using webhooks. Zoom webhooks can send notifications to external apps whenever specific events occur in your Zoom account.
By integrating ngrok with Zoom, you can:
- Develop and test Zoom webhooks locally, eliminating the time in deploying your development code to a public environment and setting it up in HTTPS.
- Inspect and troubleshoot requests from Zoom in real-time via the inspection UI and API.
- Modify and Replay Zoom Webhook requests with a single click and without spending time reproducing events manually in your Zoom account.
- Secure your app with Zoom validation provided by ngrok. Invalid requests are blocked by ngrok before reaching your app.
Step 1: Start your app
For this tutorial, we'll use the sample NodeJS app available on GitHub.
To install this sample, run the following commands in a terminal:
git clone https://github.com/ngrok/ngrok-webhook-nodejs-sample.git
cd ngrok-webhook-nodejs-sample
npm install
Now you can launch the app by running the following command:
npm start
The app runs by default on port 3000.
You can validate that the app is up and running by visiting http://localhost:3000. The application logs request headers and body in the terminal and a message in the browser.
Step 2: Launch ngrok
Once your app is running locally, let's get it on the internet securely using ngrok!
-
If you're not an ngrok user yet, just sign up for ngrok for free.
-
Go to the ngrok dashboard and copy your Authtoken.
Tip: The ngrok agent uses the auth token to log into your account when you start a tunnel. -
Start ngrok by running the following command:
ngrok http 3000 -
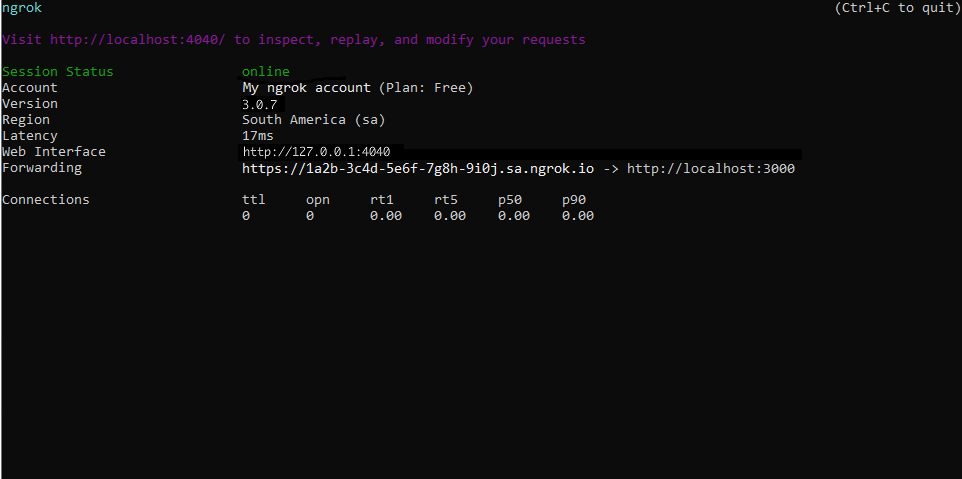
ngrok will display a URL where your localhost application is exposed to the internet (copy this URL for use with Zoom).

Step 3: Integrate Zoom
There are multiple ways you can integrate your application with Zoom. This guide covers the Webhook-only feature, which can be set up using a free Zoom account.
To register for webhook events:
-
Access Zoom Marketplace and sign in using your Zoom account.
-
Click Develop > Build App.
-
Select the Webhook Only app.
-
Enter a Name for the app and click Create.
-
Complete the registration with your Company Name, developer Name, and Email address and click Continue.
-
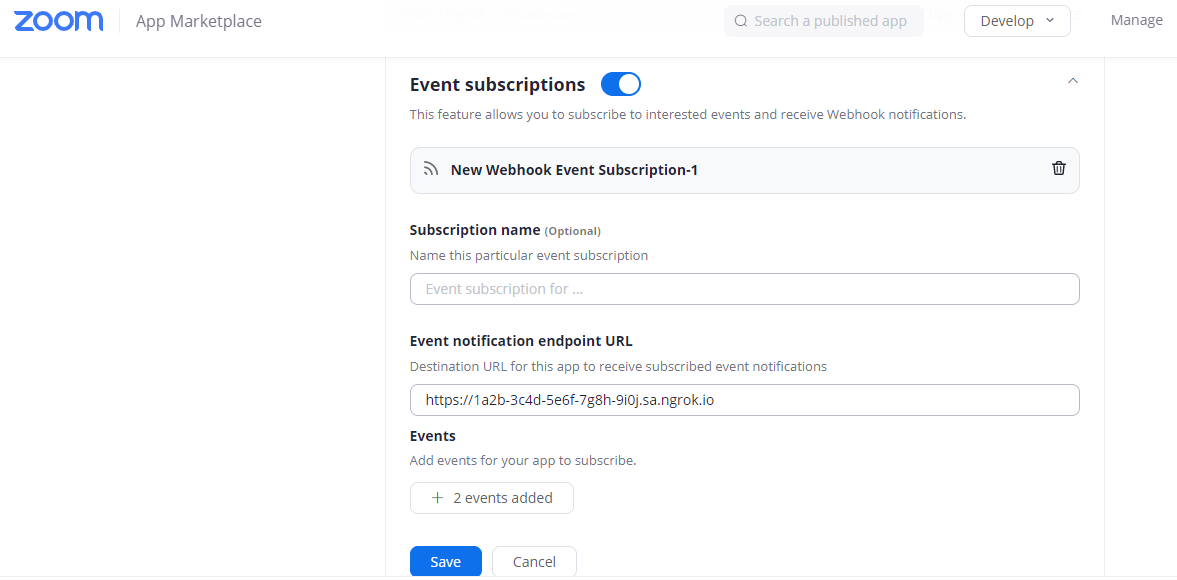
On the Feature page, click the Event subscriptions slider, click Add Event Subscriptions, and for the Event notification endpoint URL field use the URL provided by the ngrok agent to expose your application to the internet (i.e.
https://1a2b-3c4d-5e6f-7g8h-9i0j.sa.ngrok.io).
Tip: For security purposes, copy the Secret Token for later use.
-
Click Add Events. and select the events for notification. For this tutorial, select Start Meeting and End Meeting, and then click Done.
-
Finally, back to the Feature page, click Save, and then click Continue. The message Your app is activated on the account indicates Zoom is ready to send events to your app.
You can review your Webhook by clicking Manage in the top-right corner of the Marketplace page.
Run Webhooks with Zoom and ngrok
After you add a webhook to your Zoom account, access your Zoom account, start a meeting, and after a few seconds, end the meeting. The localhost app receives notifications about both events.
To review the content of these requests in Zoom:
-
Click Manage on the top-right corner of the Marketplace page.
-
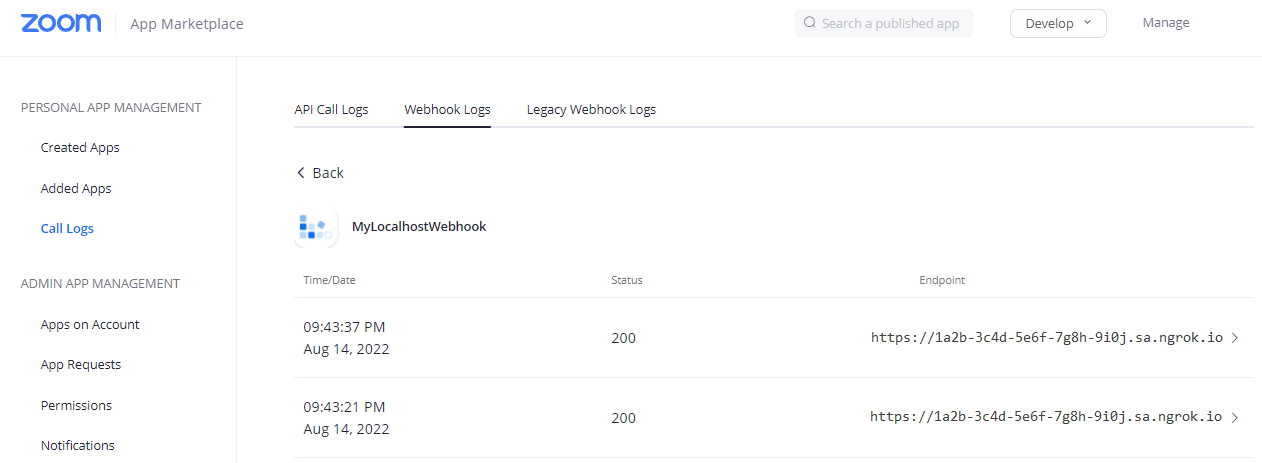
In the action column click Call Logs in the left menu, and then click the Webhook Logs tab.
-
Click your Webhook app.

-
Expand the last two log entries, compare the requestBody attribute with the body of the request received by your application for each event, and then confirm they contain the same data. Note: Zoom sends different request body contents and headers depending on the trigger event.
Optional next steps
Each post request sent by Zoom to your local application contains an authorization header with the value of the Secret Token provided during the registration of the Webhook. This information is used to secure your application to make sure it will only process information from the Webhook registered to your Zoom account.
You can either modify the sample app to validate this header information or use the ngrok signature webhook verification feature. See Add additional security using ngrok signature webhook verification.
Inspecting requests
When you launch the ngrok agent on your local machine, you can see two links:
- The URL to your app (it ends with
ngrok-free.appfor free accounts orngrok.appfor paid accounts when not using custom domains) - A local URL for the Web Interface (a.k.a Request Inspector).
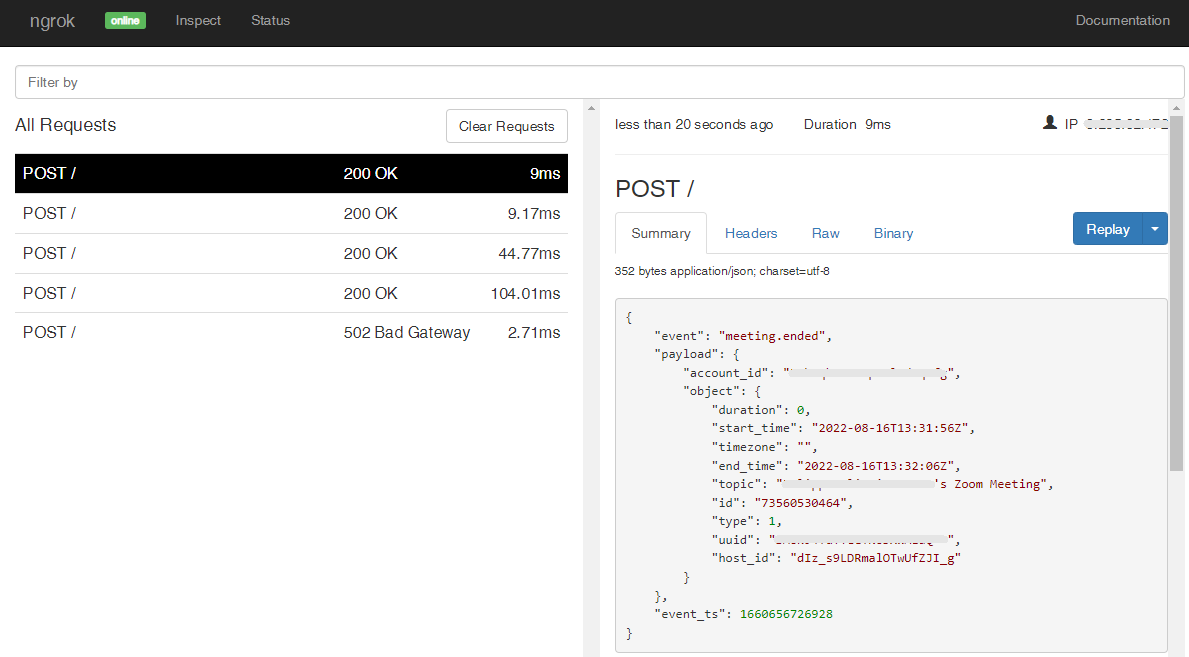
The Request Inspector shows all the requests made through your ngrok tunnel to your localhost app. When you click on a request, you can see details of both the request and the response.
Seeing requests is an excellent way of validating the data sent to and retrieved by your app via the ngrok tunnel. That alone can save you some time dissecting and logging HTTP request and response headers, methods, bodies, and response codes within your app just to confirm you are getting what you expect.
To inspect Zoom's event requests, launch the ngrok web interface (i.e. http://127.0.0.1:4040), and then click one of the requests sent by Zoom.
From the results, review the response body, header, and other details:

Replaying requests
The ngrok Request Inspector provides a replay function that you can use to test your code without the need to trigger new events from Zoom. To replay a request:
-
In the ngrok inspection interface (i.e.
http://localhost:4040), select a request from Zoom. -
Click Replay to execute the same request to your application or select Replay with modifications to modify the content of the original request before sending the request.
-
If you choose to Replay with modifications, you can modify any content from the original request. For example, you can modify the duration field value.
-
Click Replay.
Verify that your local application receives the request and logs the corresponding information to the terminal.
Secure webhook requests
The verification feature allows ngrok to assert that requests from your Zoom webhook are the only traffic allowed to make calls to your localhost app.
Note: This ngrok feature is limited to 500 validations per month on free ngrok accounts. For unlimited, upgrade to Pro or Enterprise.
This is a quick step to add extra protection to your application.
-
Make sure you have copied the Secret Token value when you were configuring your Webhook app in Zoom.
-
Restart your ngrok agent by running the command, replacing
{your secret token}with your Secret Token from Zoom:ngrok http 3000 --verify-webhook zoom --verify-webhook-secret {your secret token} -
In your Zoom dashboard, start a new meeting, and after a few seconds end the meeting.
Verify that your local application receives the request and logs information to the terminal.