Google Kubernetes Engine (GKE)
To use the ngrok Ingress Controller with Google Kubernetes Engine:
Introduction
The ngrok Ingress Controller for Kubernetes is our official open-source controller for adding public and secure ingress traffic to your k8s services. It works out of the box with Google Kubernetes Engine cluster to provide ingress to your services no matter the network configuration, as long as it has outbound access to the ngrok service. This allows ngrok to be portable and work seamlessly across any type of infrastructure.
Step 1: Ensure kubectl can speak with your cluster
With a Google Kubernetes Engine (GKE) cluster, authentication for kubectl happens with a credential helper. So in-order to deploy the ngrok Ingress Controller to your cluster, you'll need to ensure that you can use the gcloud CLI and that the credential helper is available.
Let's ensure that you have the gcloud CLI installed and configured with your Google Cloud credentials. You can confirm this works and you're authenticated correctly by running the following command:
gcloud auth list
If you see your correct Google account listed, you should be all set. If not, you can run gcloud auth login to authenticate with your Google account.
Next, we'll ensure that the credential helper is available. Run the following command to confirm that the credential helper is available:
gcloud components install gke-gcloud-auth-plugin
Finally, we can add the cluster to our KUBECONFIG:
gcloud container clusters get-credentials --region <cluster-region> --project <cluster-project> <cluster-name>
Step 2: Install the ngrok Ingress Controller
Now we can install the ngrok Ingress Controller to provide ingress to our services. We'll use Helm to install the ngrok Ingress Controller into our cluster.
-
Add the ngrok Ingress Controller Helm repo
helm repo add ngrok https://ngrok.github.io/kubernetes-ingress-controller -
Set your environment variables with your ngrok credentials. Replace
[AUTHTOKEN]and[API_KEY]with your Authtoken and API key for your account.export NGROK_AUTHTOKEN=[AUTHTOKEN]
export NGROK_API_KEY=[API_KEY] -
Next, we'll install the ngrok Ingress Controller into our cluster.
helm install ngrok-ingress-controller ngrok/kubernetes-ingress-controller \
  --namespace ngrok \
  --set fullnameOverride=ngrok-ingress-controller \
  --set credentials.apiKey=$NGROK_API_KEY \
--set credentials.authtoken=$NGROK_AUTHTOKEN -
Verify the ngrok Ingress Controller is installed and all its pods are healthy
kubectl get pods -l 'app.kubernetes.io/name=kubernetes-ingress-controller' -n ngrok
NAME                                                READY   STATUS    RESTARTS      AGE
ngrok-ingress-controller-manager-5b796c88f7-k7v6z   2/2     Running   1 (64s ago)   67s
Step 3: Install a Sample Application
Create a manifest file (for example ngrok-manifest.yaml) with the following contents. You will need to replace the NGROK_DOMAIN on line 45 with your own custom value. This is the URL you will use to access your service from anywhere. If you're on a free account, it must be on a static subdomain which you can claim by logging into your account and following the instructions on the claim static subdomain banner. For paid accounts, you can use a custom domain or a subdomain of ngrok.app or ngrok.dev (for example, username-loves-ingress.ngrok.app or k8s.example.com).
- Lines 1-34: Create the 2048 app service and deployment
- Lines 35-54 (highlighted): Create the ngrok Ingress Controller. Line 45 determines the ingress URL for public requests.
apiVersion: v1
kind: Service
metadata:
  name: game-2048
  namespace: ngrok-ingress-controller
spec:
  ports:
    - name: http
      port: 80
      targetPort: 80
  selector:
    app: game-2048
---
apiVersion: apps/v1
kind: Deployment
metadata:
  name: game-2048
  namespace: ngrok-ingress-controller
spec:
  replicas: 1
  selector:
    matchLabels:
      app: game-2048
  template:
    metadata:
      labels:
        app: game-2048
    spec:
      containers:
        - name: backend
          image: alexwhen/docker-2048
          ports:
            - name: http
              containerPort: 80
---
# ngrok Ingress Controller Configuration
apiVersion: networking.k8s.io/v1
kind: Ingress
metadata:
  name: game-2048-ingress
  namespace: ngrok-ingress-controller
spec:
  ingressClassName: ngrok
  rules:
    - host: NGROK_DOMAIN
      http:
        paths:
          - path: /
            pathType: Prefix
            backend:
              service:
                name: game-2048
                port:
                  number: 80
-
Apply the manifest file to your k8s cluster.
kubectl apply -f ngrok-manifest.yamlNote: If you get an error when applying the manifest, double check that you've updated the
NGROK_DOMAINvalue and try again. -
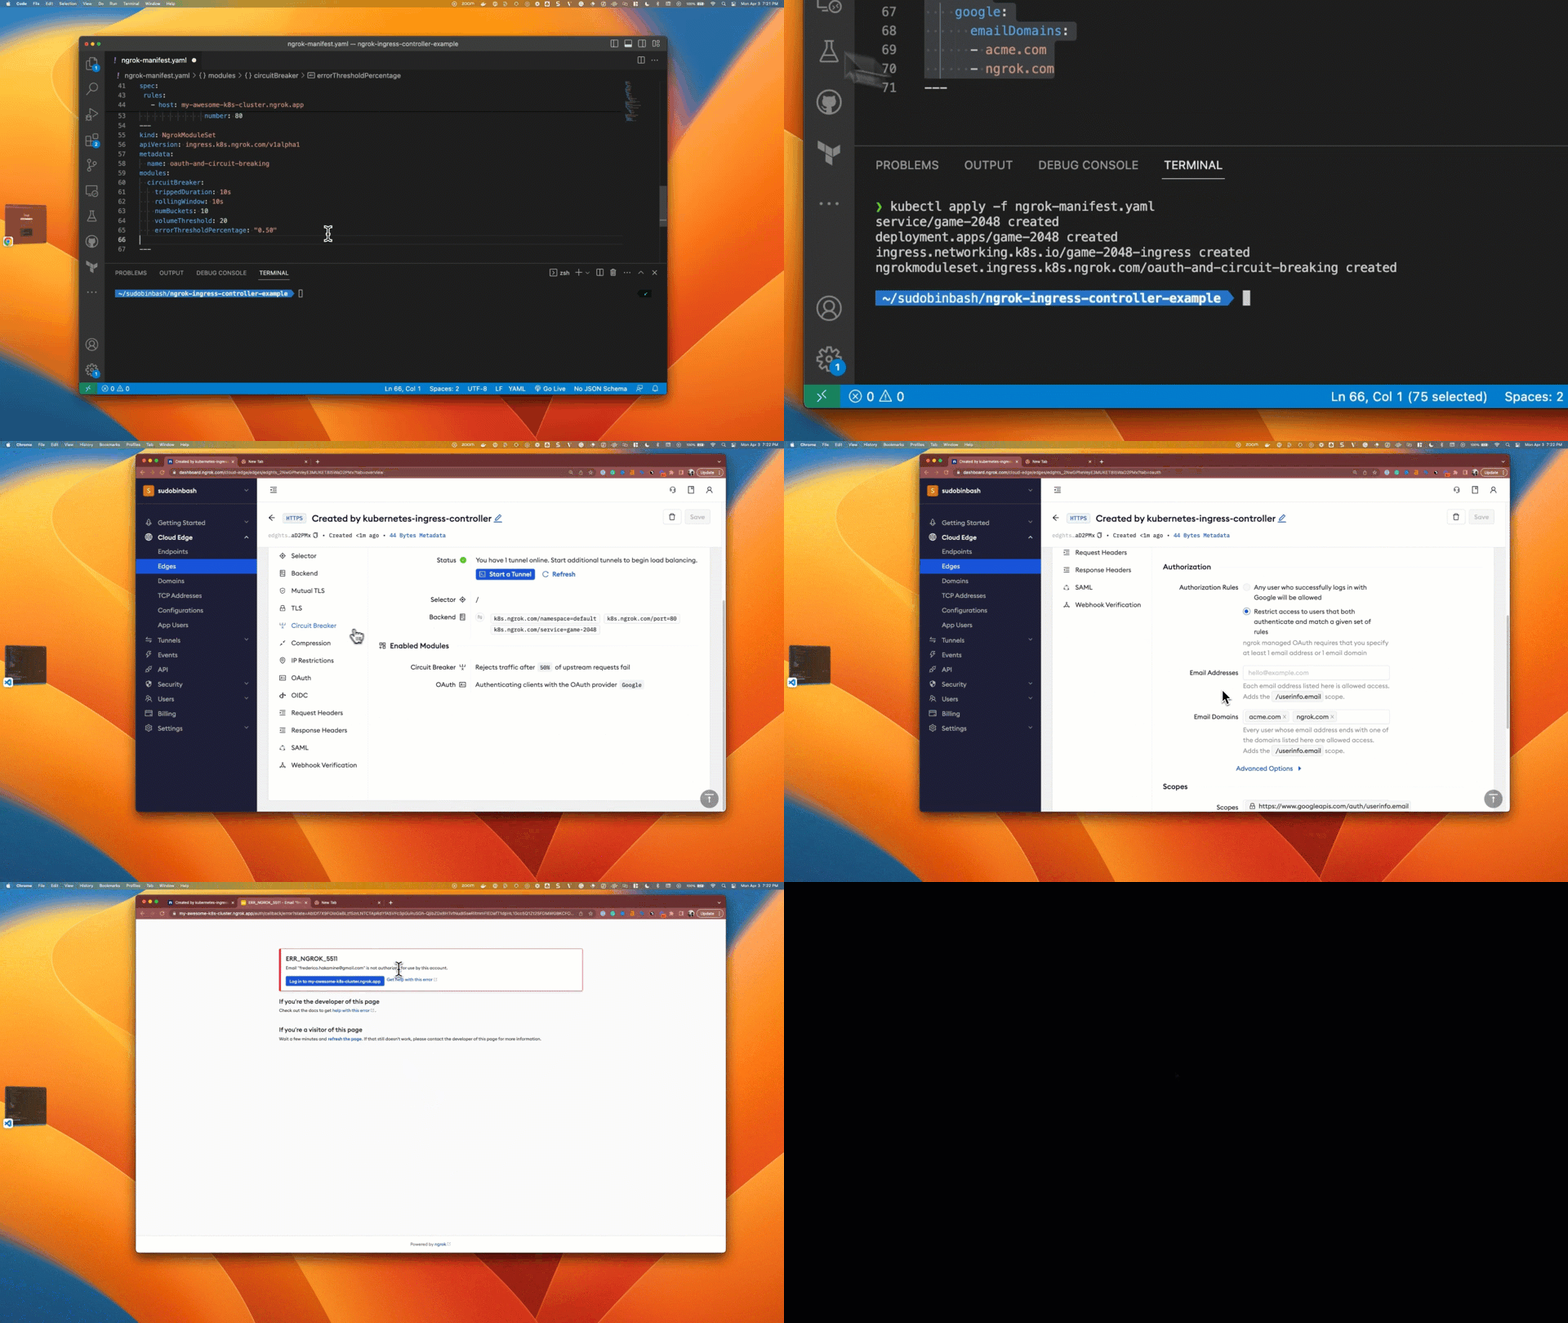
To confirm the manifest is successfully applied, go to the ngrok Dashboard and click Edge Configurations. You should see a new Edge Configuration for your cluster with the name matching your URL (1) — for example:
my-awesome-k8s-cluster.ngrok.app. Also note that your some of your cluster configurations are presented int the dashboard as annotations (2).
-
Access your ingress URL using the subdomain you chose in the manifest file above (i.e.
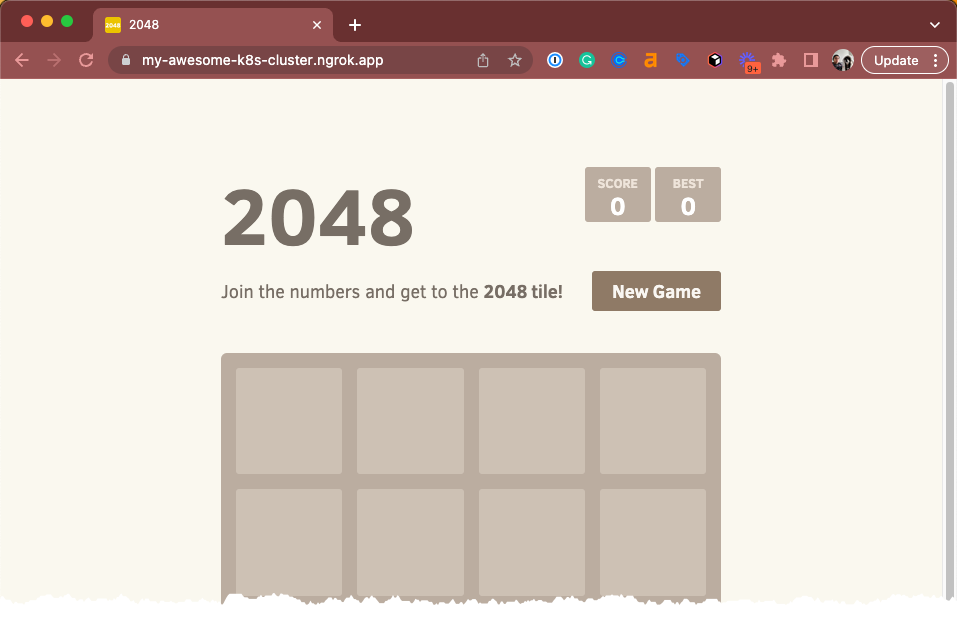
https://my-awesome-k8s-cluster.ngrok.app) to confirm the 2048 app is accessible from the internet. If you forgot what url you chose, you can always runkubectl get ingresses --namespace=ngrok-ingress-controllerto see what it is.
Step 4: Add edge security to your app
The ngrok Ingress Controller for Kubernetes provides custom resource definitions (CRDs) for additional edge features available in ngrok. In this example, we're expanding the Ingress Controller with Google OAuth to allow access only from users with the email domains @acme.com or @ngrok.com and to apply a circuit breaker to your app at 80% (requires a paid account). These features are enforced at the ngrok edge, ensuring only authorized users can access your app.
As before, you will need to update line 46 of this manifest with your NGROK_DOMAIN in the Ingress object.
This example is very similar to the previous version, with the following changes:
- Lines 41-42: Associates your Ingress Controller with the configuration
oauth-and-circuit-breakingvia annotation - Lines 57-75: Sets the edge configuration as a custom CRD (NgrokModuleSet).
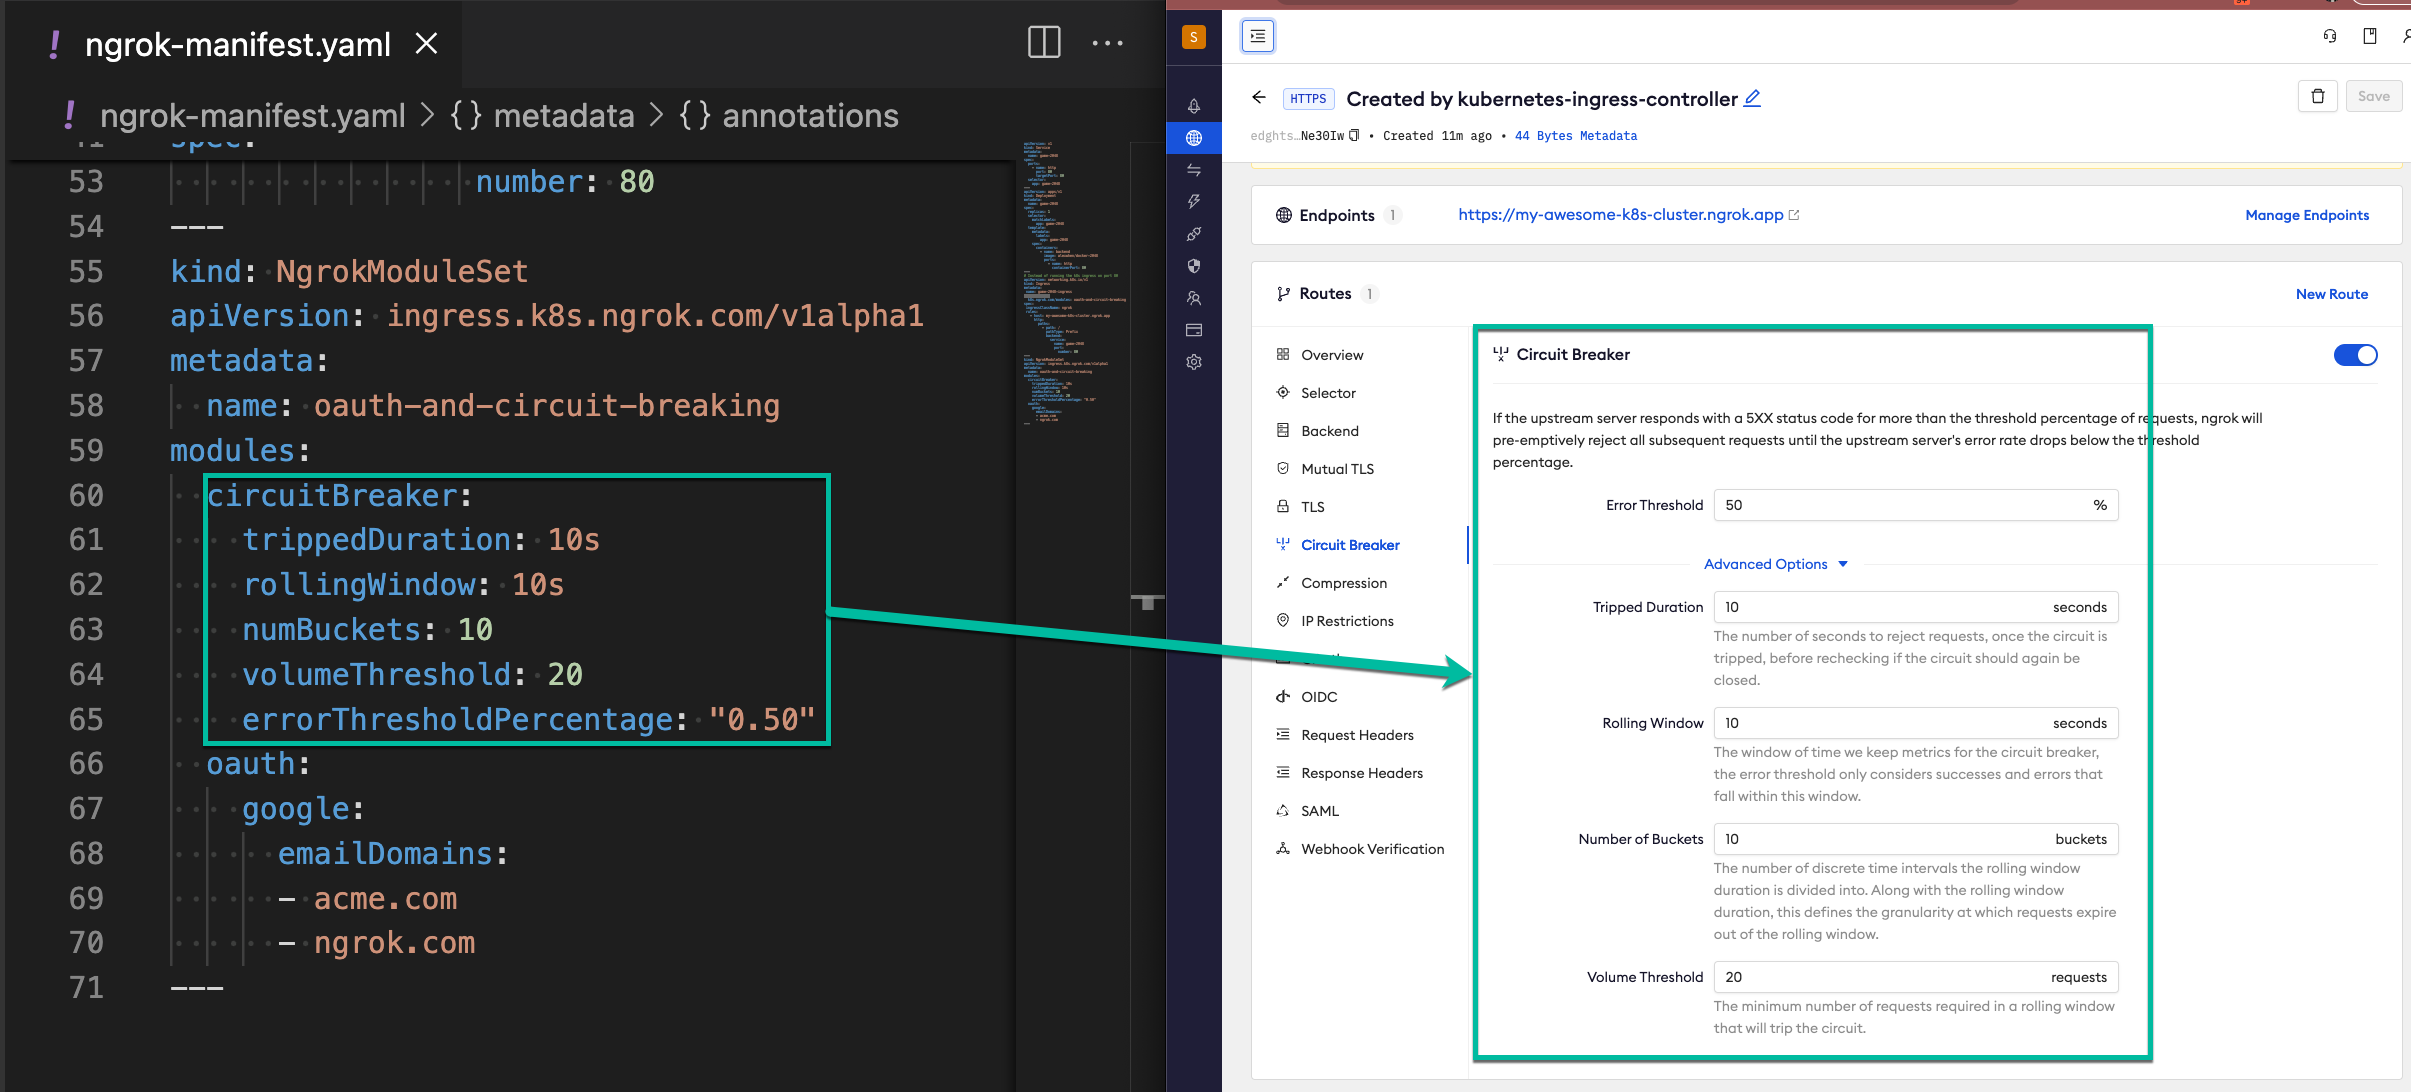
- Lines 64-69: Sets the circuit breaker module over 50% threshold.
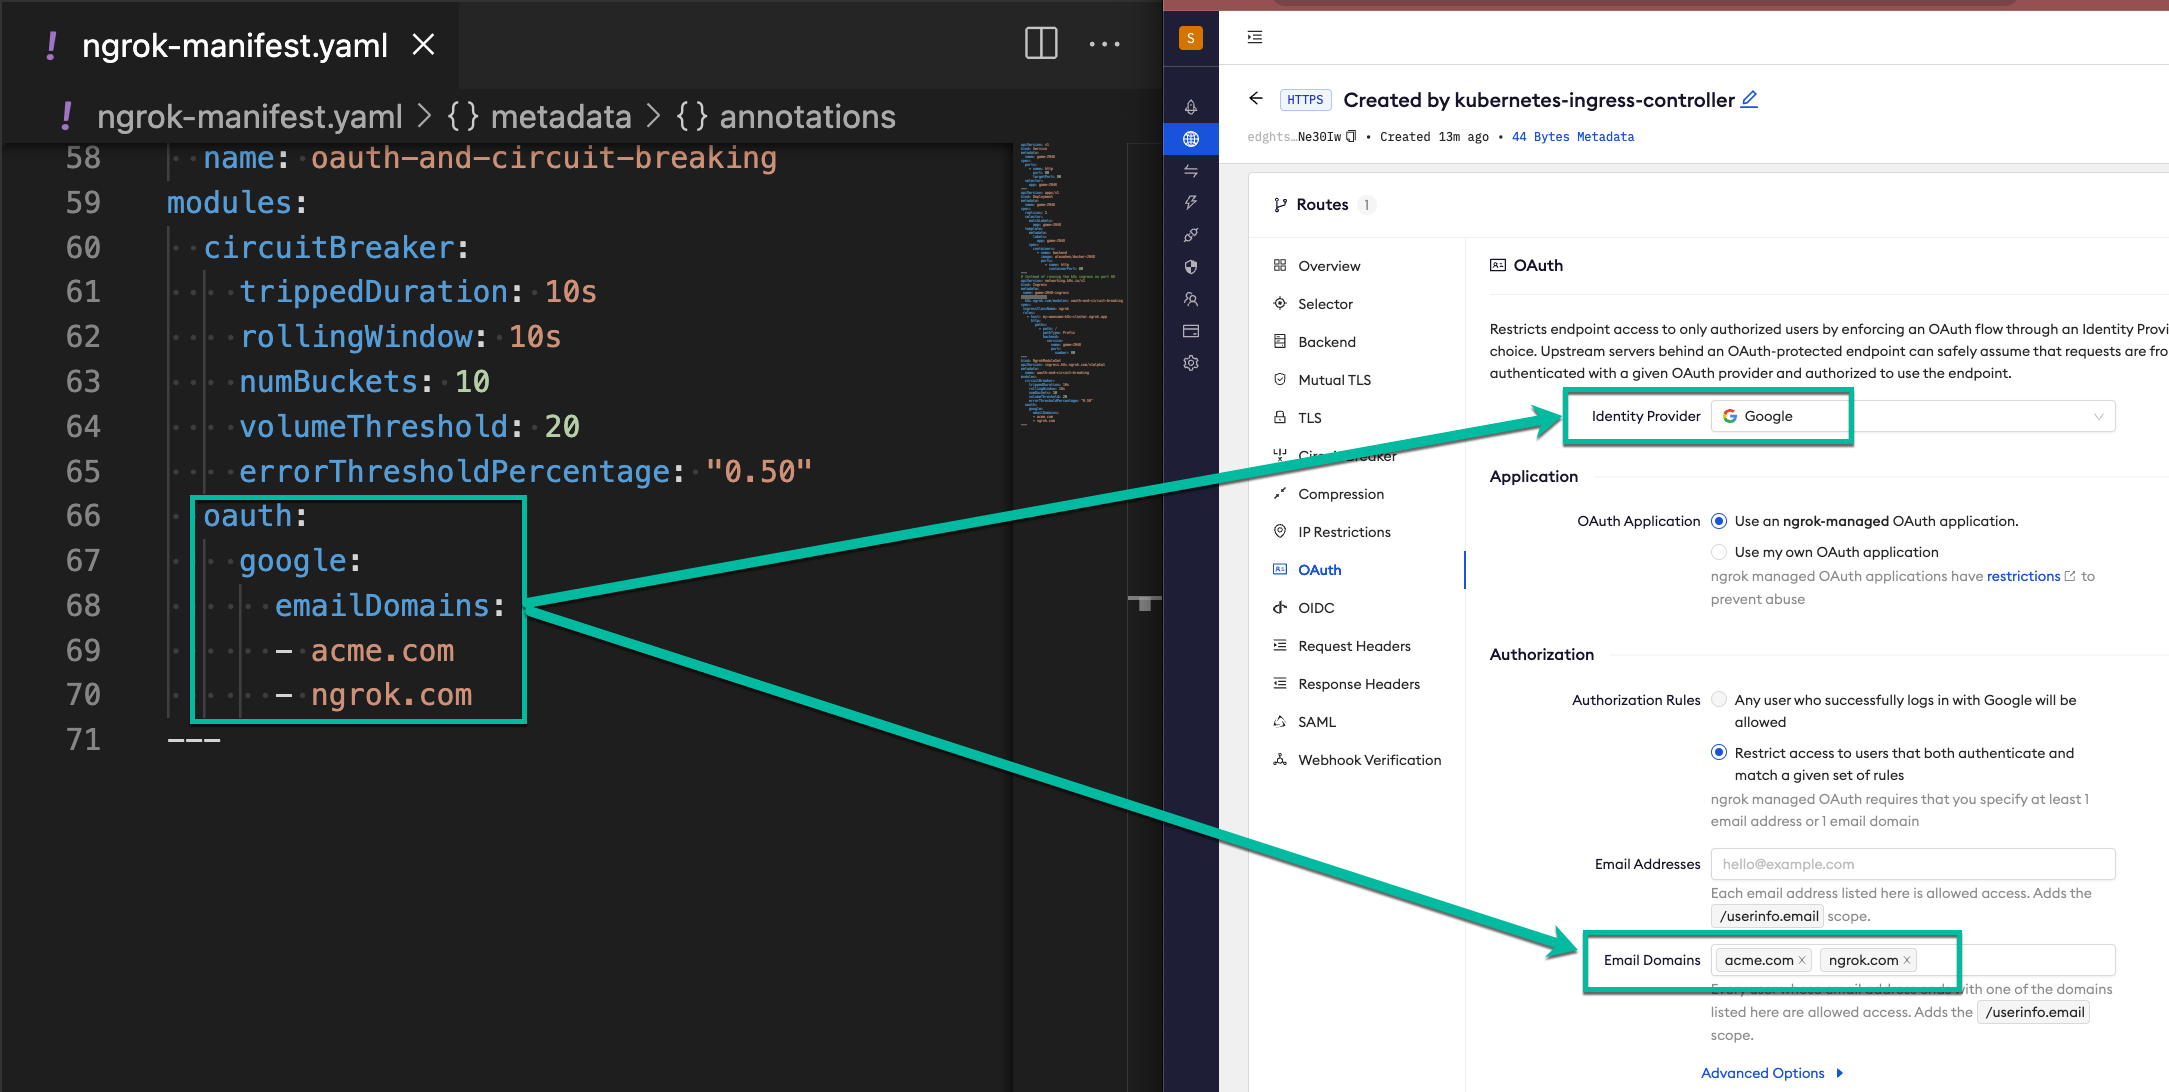
- Lines 70-74: Sets the OAuth module to allow access only for users with the email domains
@acme.comor@ngrok.com.
apiVersion: v1
kind: Service
metadata:
  name: game-2048
  namespace: ngrok-ingress-controller
spec:
  ports:
    - name: http
      port: 80
      targetPort: 80
  selector:
    app: game-2048
---
apiVersion: apps/v1
kind: Deployment
metadata:
  name: game-2048
  namespace: ngrok-ingress-controller
spec:
  replicas: 1
  selector:
    matchLabels:
      app: game-2048
  template:
    metadata:
      labels:
        app: game-2048
    spec:
      containers:
        - name: backend
          image: alexwhen/docker-2048
          ports:
            - name: http
              containerPort: 80
---
apiVersion: networking.k8s.io/v1
kind: Ingress
metadata:
  name: game-2048-ingress
  namespace: ngrok-ingress-controller
  annotations:
    k8s.ngrok.com/modules: oauth-and-circuit-breaking
spec:
  ingressClassName: ngrok
  rules:
    - host: NGROK_DOMAIN
      http:
        paths:
          - path: /
            pathType: Prefix
            backend:
              service:
                name: game-2048
                port:
                  number: 80
---
# Module configurations for Circuit Breaking and OAuth
kind: NgrokModuleSet
apiVersion: ingress.k8s.ngrok.com/v1alpha1
metadata:
  name: oauth-and-circuit-breaking
  namespace: ngrok-ingress-controller
modules:
  circuitBreaker:
    trippedDuration: 10s
    rollingWindow: 10s
    numBuckets: 10
    volumeThreshold: 20
    errorThresholdPercentage: "0.50"
  oauth:
    google:
      emailDomains:
        - acme.com
        - ngrok.com
---
-
Save your file and reapply the manifest file:
kubectl apply -f ngrok-manifest.yamlNote: Again, if you get an error when applying the manifest, double check that you've updated the
NGROK_DOMAINvalue and try again. -
To confirm the circuit breaking configuration is successfully applied:
-
Go to ngrok Dashboard > Edge Configurations.
-
Click the edge configuration that matches your URL.
-
On the left hand side, click Circuit Breaker.
-
Notice how the circuit breaker configuration matches your manifest file.

-
Click OAuth and confirm how the oauth configuration matches your manifest file.

-
-
Access your App and confirm that you got the expect authentication behavior:
